 (Image via
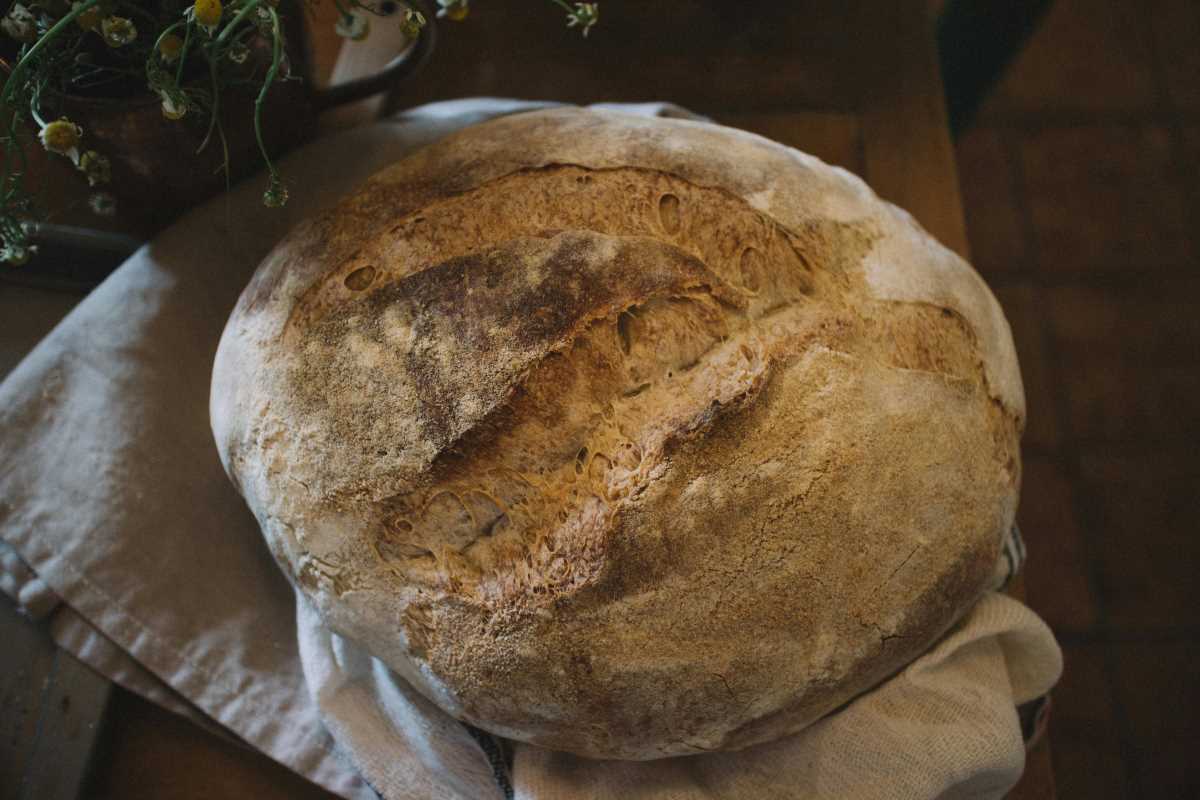
There’s a special kind of joy in pulling a loaf of homemade sourdough bread out of your oven. From the crackling golden crust to the soft, tangy interior, sourdough bread is a labor of love. But with terms like levain, autolyse, hydration, and bulk fermentation tossed around, baking sourdough can feel more like a science experiment than something you’d do in your kitchen. The truth? Sourdough is magical, yes, but it’s much simpler than it sounds. With the right steps and an understanding of the process, anyone can bake a perfect homemade loaf. This guide breaks down each step, providing practical tips to make sourdough approachable, delicious, and deeply satisfying.
Step 1: Understanding Sourdough Basics
Before you can start baking sourdough bread, you have to know how to make the sourdough starter. Unlike breads that use commercial yeast, sourdough bread rises with a naturally fermented starter. A starter is a mixture of flour and water that captures wild yeast and friendly bacteria from the air. Over about 7-14 days of regular feedings, this mixture becomes active and bubbly, ready to help your dough rise.
There are a few keys to success with your starter.
- Timing matters: While many beginners report a ready-to-use starter in a week, some bakers find it takes up to two weeks or longer, especially in cooler environments. Be patient. We promise the wait is worth it. You’ll know your starter is ready when it doubles in size after feeding, bubbles actively, and passes the “float test” (a small spoonful floats in water).
- Feeding consistently: Discard a portion of your starter daily, then feed it fresh flour and water in equal weights. For best results, use a kitchen scale to measure!
Got your bubbly starter? Congratulations, you’re ready to make dough!
Step 2: Gather Your Ingredients
Sourdough requires just a handful of ingredients, so quality is crucial.
- Flour: Bread flour is ideal because of its high protein content, which strengthens gluten. Whole wheat or rye flour can boost fermentation but may lead to denser loaves.
- Water: Filtered or distilled water is best. Tap water with chlorine can affect fermentation.
- Salt: Sea salt or kosher salt enhances flavor without harsh additives.
- Sourdough Starter: Your active, bubbly starter is the main leavening agent.
Optional ingredients like seeds, herbs, or cheese can be added later, but for your first loaf, stick to the basics.
Step 3: Mixing the Dough
Mixing your dough is the start of the bread-making process and sets the stage for a successful bake. Sourdough dough is sticky, but that’s completely normal.
- Combine the ingredients: Mix 500g of bread flour, 350g of water, and 100g of active starter in a large bowl. Stir until there are no dry bits of flour. Don’t worry if the dough looks rough because it will smooth out over time.
- Rest (autolyse): Cover the bowl and allow the dough to rest for 30–60 minutes. This is called the autolyse, and it helps gluten development without kneading.
- Add salt: Sprinkle 10g of salt over the dough and add a tablespoon of water to help dissolve it. Gently knead the dough until the salt is fully incorporated.
Keep in mind that while some bakers add salt later in the process, mixing it in early (during or after autolyse) simplifies things for beginners without sacrificing results.
Step 4: Bulk Fermentation
This is where the magic happens. During bulk fermentation, your dough will rest and rise as the yeast and bacteria do their work. The process typically takes 4–6 hours at room temperature and includes a few stretches and folds to develop gluten.
- Stretch and fold: Every 30 minutes for the first 2 hours, gently pull one side of the dough and fold it over itself. Turn the bowl and repeat on all four sides. This strengthens the dough without overworking it.
- Leave it to rise: After the last fold, cover the dough and leave it alone until it’s about twice its original size. You should see bubbles on the surface and feel a light, airy texture.
Step 5: Shaping the Dough
Shaping helps your bread hold its form as it bakes. It’s all about building surface tension in the dough.
- Pre-shape and rest: Turn the dough onto a lightly floured surface. Gently form it into a rough ball and allow it to rest for 15–20 minutes.
- Shape the final loaf: Using cupped hands, shape the dough into a tight ball or oval. Place it seam-side up in a floured proofing basket or in a bowl lined with a floured kitchen towel.
Step 6: Final Proof
Now, the dough gets a final rise before baking. This step can be done at room temperature (1–2 hours) or in the fridge (8–12 hours). Refrigerating (also called cold proofing) slows fermentation, enhances flavor, and makes the dough easier to handle.
How do you know it’s ready? Perform the “poke test.” Gently press your finger into the dough. If it springs back slowly and leaves a slight indent, it’s good to go.
Step 7: Baking the Sourdough
This is the moment you’ve been waiting for—time to transform your dough into a crusty, golden loaf!
- Preheat with steam: Place your Dutch oven (or a heavy pot with a lid) in your oven and preheat to 475°F (245°C) for at least 30 minutes. Steam is critical for a crispy crust.
- Score the dough: Flip the dough onto parchment paper and cut a shallow slash on top using a bread lame or sharp knife. This allows the bread to expand during baking. Cut at a slight angle.
- Bake and finish: Carefully transfer the dough into the preheated pot, cover, and bake for 20 minutes. Then, remove the lid and bake for another 20–25 minutes until the crust is deep golden brown.
Step 8: Cooling and Slicing
Resist the urge to slice your bread right out of the oven! Allow it to cool on a wire rack for at least an hour. Cutting too soon can result in a gummy texture.
Enjoy your masterpiece with butter, jam, or just as it is. You’ve earned it.
Common Problems
No need to be discouraged if your first sourdough isn’t perfect. Bakers face a lot of common problems.
- Dense bread? Likely under-proofed. Make sure the dough rises properly during both the bulk fermentation and final proof.
- Flat loaf? This could be due to weak gluten development. Focus on the stretch-and-fold technique and shaping.
- Lack of sour flavor? Extend the proofing time in the fridge to develop more tangy acidity.
Each loaf teaches you something new, helping you refine your process and build confidence. The more you bake, the better you’ll understand your dough and your starter.
These steps may look lengthy on paper, but they’ll soon become second nature. Don’t rush yourself. Sourdough rewards patience and care. Now, it’s your turn to create a beautiful loaf you can be proud of.